Showing posts with label Bridesmaids. Show all posts

Wednesday, April 11, 2012

Living Dolls

I made these to ask them to be my bridesmaids:

On the day of the wedding they took this:

They're so much prettier in 3-D. I love my bridesmaids! They all looked amazing on the day of. After all the dress drama and general stress I was elated by their loveliness.

Friday, March 30, 2012

Bridesmaids Emergency Kits

As most of you remember I made my bridesmaids personalized tote bags with cute little mushroom tags on them. Inside the bags went their t-shirts, necklaces and emergency kits. I passed them out at the bachelorette party.

I assigned the kits to one of the girls, but ended up finding a bunch of stuff on a Target trip so we each contributed about half the contents. I think they came out great and they definitely got used. Yay!

I had a lot of trouble figuring out what to put the kits in. I'd already spent a decent amount and didn't want $25 dollar a piece make-up bags from Etsy (although there were super cute ones). I struck out looking for cool pencil cases. In the end I just got cute little birdie boxes from Target. They were larger than I intended, but we filled them. They weren't a perfect fit inside the bags, but I think they looked ok. My fondest hope is that the girls will find a spot on there desk or in their bathroom for them.

Contents
  • Deodorant (travel size)
  • Shout Stain Wipes
  • Nail File (full size)
  • Lotion
  • Hand Sanitizer
  • Tampons & Pads
  • Lint Roller (full size): smaller probably would have fit better
  • Pill Case with Advil & Antihistamine
  • Make-up remover wipes
  • White & Clear nail polish
  • Tissues
  • Mentos mints
  • Sewing kits
  • Chocolates
  • Bandaids
  • Chapstick
  • Hairspray (travel size)
  • Q-tips

I did the list from memory, emails and pictures, but I'm pretty sure it's accurate. We were supposed to also have bobby pin matchbooks, but those never happened. I bought a bunch of bobbypins, but then forgot to bring them to the salon and then my maid of honor had to run out for more while I was getting my hair done. So, bobby pins in the kits is a good plan. Other than that I think they were perfect.

Sunday, March 18, 2012

Mad Hatter Tea Party Bridal Shower

Bridal shower day! I do wish we'd planned it for later in the day since my bridesmaids partied all night with me and then got up early to set-up the shower. Up at 8am after a bachelorette party to pick up fresh canolis and such. My girls are rock stars. I got up at 9am which is sleeping in when you have a toddler. I had coffee and got ready with my unofficial bridesmaid (and awesome henna artist). When I arrived I was greeted with a crub side canoli.

I waited to do both my bachelorette and shower until the weekend before the wedding so my sister (and only out of town bridesmaid) could be there. It was an absolutely beautiful March afternoon. Everyone brought a dish to share and the girls invited everyone to wear the "bestest maddest hat". I think only three people came sans hat (we provided some) and most people really did a wonderful hat decorating job! I loved them all. I love a good party theme and this one was a winner for sure.

The food was amazing too. Aside from fresh canolis there was a gorgeous wedding cake shaped teacup cupcake display. Each teacup had a cupcake with an Eat Me sign in it. The girls printed little labels that said Mike & Katie 3/21/12 for the bottom of each cup (which they collected at thrift stores). The teacups were favors for the guests to take home. Lovely. There were tea sandwiches, mimosas, tarts and so much more. The only thing we didn't touch was the hot tea, it was just too warm. We ate outside at tables with mismatched table cloths under the shade of mismatched umbrellas. It was very wonderland.

It made for a very jolly atmosphere. People made amazingly sweet toasts I teared up a little, but mostly we laughed about how lost Mike would be without me. We played that clothes pin game where you couldn't say the grooms name and later you couldn't say the bride's either. My mother-in-law took the prize for that one, a tea pot. Before we went inside we played a game where armed with Mike's answers to a set of questions the girls asked me to tell them things about Mike. When I got one right they clapped. When I got one wrong I had to chew a piece of gum. Blah. I ended up gagging on the wad of gum and starting over. I think I got half of them right. I maintain that some of his answers were wrong, though.

That's me with my bridesmaids! Nice party girls! Don't worry we toasted our hostesses as well. After everyone was full we moved inside for presents. The very first one was from my mother-in-law. It was Mike's grandmother's handkerchief and beautiful card. That's when the water works really started. I love my new family. My mom also gave me her grandma's handkerchief with the pin my mom wore for her something blue on it, so I will have several generation of women with me on my day. I got clothes and a hanging travel bag for the honeymoon, some lovely cards, towels and a shoe organizer among other things.

The best part of gifts was my wonderful bow bouquet. I had been so looking forward to having one. Lara made it from all the ribbon and pretty tags and then made tissue flowers to fill the gaps. Isn't it perfect? Just like my shower, amazing. What a great day. Now for a nap!

Saturday, March 17, 2012

Bachelorette Party!!

I wanted a slumber party/mehndi night. It was a little bumpy getting my family out the door, but sooooo worth it. It was exactly what I wanted (and needed).

Proper bachelorette party attire? Check. Those are pink jammies with Mickey and Minnie on them that say "the perfect couple" and "love is the answer". I'm a wild one. What can I say?

Proper accessories, check. Novelty crown with viel and sparkly bride button. Also, a bindi that matches my jammies, a must.

Ready, set bridal henna!! I was in love with my henna. It came out lovely. Mike's initials are in the foot design. It actually says MH hearts KC. Perfect.

All the bridesmaids henna. So cool and unique. It was a great night. We ate junk food, watched Bridesmaids and Hangover 2 and got awesome henna. 4 days....

Friday, March 16, 2012

The Dress That Wasn't

I have 5 more posts as un-legally-married woman! Whoa. That being said there is so much to say on the subject of my wedding as I sit down to type my head spins. I broached the subject in an earlier post, but this is an incredibly specific incident. My bridesmaids dresses are beautiful Jim Hjelm Occasions (style 5007) in emerald green dupioni silk in a very classic 50's cut.

They became a nightmare because of where I chose to purchase them. The girls were given dresses two sizes too large and they all had to pay almost as much as they paid for the dress for alterations. I feel physical pain thinking about it. When I started I pictured black strapless dresses with green sashes, something in the neighborhood of $30 per dress. Once I had my wedding party assembled we decided against strapless and once I found the dress I decided against black.

I loved the classic 50's cut of it. It's fun, spring-y and figure flattering. However, the quirky asymmetry on top gave the seamstresses headaches, the color caused friction (and later doubt) between Mike and I and the cost of dress plus alterations became a problem. The other night I was watching My Fair Wedding and I saw the dress. The one I should have chosen. On the show it was black with a sparkly brooch. Mike and I gasped. Stunning. It's Aria style 121

Vintage, fun and simple. In black with the sparkly brooch just like on the show. That should have been the dress. I looked it up thinking it would be expensive and kick my rational brain into overriding the waves of sadness and regret. It's slightly less! They will ship you a sample to try on in your own home! (Face Palm) Mike said it would have looked beautiful on my girls. I agree. I love it.

When I really got sad Mike suggested that some time after the wedding I buy it for myself. It's a nice idea, but our bank accounts are hemorrhaging money as is it and as a mother of two spending more than $20 on an article of clothing for myself makes me nauseous with guilt. Anyway, heed my warning and shop around! I fell in love with a picture in a wedding magazine (steer clear of those!) and never thought twice when the girls agreed. Look around take at least one bridesmaid with you if you can and really think it over. Don't find the perfect style/color/hassle-free dress when it's too late.

Wednesday, March 7, 2012

The "Boutique Experience"

It started out great. The first time I went in to pick bridesmaids dresses I was in the wheelchair with a toddler. No nasty looks at all. They even carried the wheelchair up the front steps since the building wasn't accessible. Perhaps that should have been a red flag. Maybe I should have boycotted on principle. Neither I nor my bridesmaids had big budgets, but I wanted to check it out.

They had the Jim Hjelm dress I's been mooning over at a reasonable price for a designer dress. I poured over the color book for a long time. They had black which way back then was what I thought I wanted, but they also had some greens. It was hard to decide based on teeny scraps of fabric in a book. Especially since dupioni silk changes color based on movement and light. They couldn't show me any dresses they were in the fabric and color I liked. They were very patient and friendly. Then again that was before they knew I wasn't buying a wedding dress from them.

Once I conferred with the girls about the design and budget I got really excited. They were all in. We scheduled a fitting for when my sister was down. It was a mistake to take everyone together or at least to hang out just outside the dressing room. Everyone was sad afterward. At the time I couldn't understand it.

It all became clear four months later when the dresses came in. They were across the board enormous. Like falling off, two sizes too big! It was ridiculous. I called the boutique who calmly clarified that bridesmaids dress are not made custom like wedding gowns. They have a chart from the designer they match the measurements to and if even one measurement is a 3/4" bigger they go up a size. So, what is the advantage of the boutique verses buying off the rack?

She went on to inform me that two weeks before the wedding the girls were welcome to come in and get alternations. She told me not to worry that they would only cost $20 dollars. So, we all relaxed a little. I was still kicking myself over choosing this place, but at least there was hope. In the meantime I requested a swatch of material for the florist 3 separate times and never received it. They sent a letter to my house informing the dresses were in so it wasn't an address issue.

Fast forward to this week. It is now two weeks before my wedding. My maid of honor went in for alterations. She was charged $75!! Apparently, it was $20 to take it in, $20 to fix the straps...and so on. WHAT?!? I was deliberately mislead. I can not believe they gave my girls enormous dress and than charged them just shy of $80 bucks to fix it.

I would NEVER use them again for anything. What a racket! I'm furious. Why didn't they ever send my swatch? Why didn't they educate me on the process? Why didn't they have the girls try on the dresses when they picked them up like they told me they would over the phone? Why weren't they honest about the alteration fees?

Do not use C.C.'s Boutique at 770 4th Avenue North St. Petersburg, FL 33701. They are not wheelchair accessible. They are not informative or as it turns out honest. I plain to review them everywhere that allows a review and to inform them as much. I really thought paying for a designer gown would entitle the girls to royal treatment. I feel dirty after the experience.

Upon further research it seems many girls have had similar issues. Dresses that are too big, but especially grossly misquote alterations prices. If you're interested go to google reviews after the first two their terrible. At Best Tampa Bay Weddings scroll down on the first page to Morgan's review on 10/7/11. I wish I'd read it first. She ends with " I do not want to waste another minute of my time in that factory of a "bridal boutique."The moral of the story is customer service here. This was not my best experience. I wish it could have been better, but unfortunately it was not. I do not recommend this store to anyone looking to get married, and bridesmaids, don't expect the red carpet to be rolled out. You might as well take a number at the door upon entering just like you do at the DMV. They are looking to roll you in and out as quickly as possible." I think she summed it up well!

Sunday, February 5, 2012

The Finishing Touches: Bridesmaids Shirts

I knew I wanted to add names to the backs of the girls shirts. I considered rhinestones, puffy paint and the like, but than I saw these. This bride used Sharpie and acrylic paint. Here's what my attempt looked like.

Materials
  • Shirts (With cool graphic on the front)
  • Small foam brush
  • Acrylic paint
  • Sharpies
  • Cardboard

Here's what the front looks like:

AND

Insert cardboard in your shirt before you start. Work on a hard surface with good lighting. I started by writing the letters with a white paint marker, but it was really hard to see on the white shirt. I went over the white outline with a fine tipped green Sharpie. Although the white paint paint came in handy covering up the little oopsies. Then I used the corner of a foam tipped brush to fill in the letters. If you're handwriting is bad you may want to print out your text, cut it out and stencil it on.

I recommend starting from the end of the word when painting if you're a fellow leftie. I dragged my hand through the paint on my first attempt. Depending on the style your going for you may want a smaller brush. I went outside the lines here and there because I knew I was going to outline the letters. It drys pretty quickly. By the time I had written the next name the first one would be dry.

I outlined the letters with black Sharpie to match the text on the front. Then I let it sit a few more minutes and removed the cardboard. I folded and rolled the shirt and tied it with adorable mushroom ribbon. Here it is all ready to go in her tote bag.

I also made shirts for Mike and I with two mess-ups from the bridesmaids printing. His say Mr. “My Last Name” and mine says Mrs. “His Last Name”. They came out cute. I just pianted over the blurry word with dark green and wrote on it with white paint pen once it was dry. It'll make people giggle since even though we're not changing our names people will call us by each other's name the rest of our marriage.

Sunday, January 22, 2012

Lunch With Team Bride

Today I gathered the girls and took them to a well deserved lunch. We went to Panera for sandwiches and sat outside it was a nice day. Leading up to lunch I'd been firing off emails, stuffing invitations, working on the rough seating plan, and a million other miscellaneous wedding related things. I woke up feeling overwhelmed. This lunch was the cure for my harried feeling.

All my lovely bridesmaids attended except one who was home with very sick kids. We had a nice chat about the things that went wrong or got forgotten on their wedding days. It's nice to have experience in your corner. Instead of making me worry their tales were terribly comforting and amusing. My maid of honor presented me with a stack of mildly embarrassing old photos for the slideshow. Good times though, when did I get so old?

We worked out the dates for my shower and bachelorette party. We're all excited for those. I think we worked it out so that there will be maximum attendance. Everyone confirmed their collective employers have released them the day before and day of the wedding, Yay! Not bad, for a Wednesday wedding. We discussed the events of the day before the wedding and who's coming to the rehearsal dinner. I've happily handed the responsibility for that over to Mike's dad so I had no idea who was coming to dinner exactly.

We also, thanks to Bekah's suggestion and Lara's mp3 player, picked a song for the parent dance. YAY! It was a very productive lunch. After a brief discussion about my frustration with Mike not having anything to wear Sandy and I decided to venture around the corner to Mens Wearhouse to check things out after lunch.

Regardless of the lackluster performance by the Mens Wearhouse staff it was a fruitful trip. I came home with a plan for the boys clothes that Mike actually liked. That is saying something. More on menswear later. I came home and full of inspiration started making my ring pillow from two small burlap sacks. More on that later too.

Thursday, January 12, 2012

Team Bride Has Shirts!

From the beginning I planned to present my lovely bridesmaids with tote bags containing their jewelry, a t-shirt and an emergency kit as their swag. I finished their super cute bags in October and have a bridesmaid completing the day of kits. My intention is to have them wear their shirts at the rehearsal. I was going to make them for the whole wedding party, but Mike informed me that no guy wants to wear a shirt that says Groomsman on it no matter what it looks like. So, I decided to design shirts for just the girls.

Materials

  • Photo editing software (photo or paintshop, etc)
  • A free font site
  • A custom t-shirt making site

OR

  • White t-shirts
  • Photo editing software
  • Printer T-shirt transfer paper
  • Iron (ironing board/had surface)

Drumroll....

I found a picture of some old trees in a Google search. I cropped them and turned them black and white in Paintshop Pro. Then I went to fontfreak.com and downloaded a cool free font. I adjusted the color and size until I was happy. I also wrote their names and the year in the same pretty font on the back.

Now, at this point I decided not to do the shirts myself, but to upload them to a t-shirt printing site. I started with customizedgirl.com which was great because there were lots of styles and colors to work with and it was easy to edit. However, when I added up the cost of the shirts on their site I started shopping for deals. I then re-uploaded to Vistaprint.com for about $4 a shirt and free shipping.

The only downside to the switch was that they wanted $5 extra to put the names on the back and I couldn't make the font look right. So I decided I'd put the names on myself when the shirts came in. By the way, I did send the girls an email with the size chart and double checked all their sizes before I ordered. In the end with my image upload fee and tax (shipping was free) I paid the same amount for all 4 shirts as I would have paid for one on the other site. They should be here next week.

If you do them yourself (I always make the kids shirts for holidays this way), remember that once you have the image the way you want it you have to flip it. In Paintshop it's called mirror. You need it completely mirror imaged before you print it so that it comes out correctly on the shirt. Make sure you check the ink levels in your printer before you get started too. Once the image is reversed and printed cut as much white space out as possible before you iron it on. Follow the instructions for the transfer paper. Remember not to move it off the ironing board until it cools to prevent cracking. Also, instruct the receptions to wash them inside out.

When they come in I'll post about adding the names. I'm thinking rhinestones...We'll see. Next I have to decide if I'll do shirts for Mike and I myself or not. I either want Mrs. (HIS LASTNAME) or Mike's Wife that way I can wear it again. Those will probably be t-shirts, iron on embellishments and fabric paint.

Wednesday, December 21, 2011

Bridesmaids

Through all kinds of injuries, family drama, major life changes and so much more they have been there in planning and my life in general. Thank you, ladies. For being there from the beginning. I'm so glad you all signed on for my offbeat weekday wedding.

Thank you for showing up to my pre-wedding events and surprising me with one! Thanks so, so much for liking my dress choice. Also, for responding to multiple emails about jewelry and shoes with feedback. I appreciate it. Thank you for letting me know when you were chopping your hair off or signing on as bridesmaid in two other weddings. Love the communication and support, go team.

Thank you for bearing with me through all the dresses being too big and shoes selling out. You are all rock stars for always going the extra mile.

When people rant and rave on message boards that to expect anything other than purchasing a dress and standing with you on your wedding day is unreasonable, I can see the roots of their point. I'd never want to stress anyone out or make selfish demands, but mostly it just makes me sad for all the brides that don't have the support I do. I love you girls!

Tuesday, December 6, 2011

Bridesmaid Bio: Miss Jess

I got the best news today! My sister is coming in the week before the wedding. She booked her ticket! It's so exciting. If nothing else all my bridesmaids with be in attendence and have their dresses.

This picture was taken almose five year ago now when we both lived in California. More specifically one exit apart in The Valley. It was a great thing, but we've never lived that close to each other before or since in our adult lives. I miss her alot and she misses seeing the kids grow up. I'm thrilled that she's really coming. I didn't doubt that'd she'd show up it just feels so offical now.

I'd been toying with the idea of doing extended wedding party bios in March, but this seems like a good time to tell you about Miss Jess. She's my only sibling. We're three years apart. I alway knew she'd be a bridesmaid if I ever got married. She is my go to person for hair and make-up help because I'm terrible at that stuff. I miss her more everytime I get dressed up for something and don't have her feedback. I'm super excited for getting dolled up together on the wedding day.

She's one of my biggest fans and she'll be indespensable on my big day. She's very sweet and has a fantastic sense of humor. My first memories of her are funny ones. Sometimes Riley reminds of her so much. We're very different in a lot of ways, but we're very close. I can't wait to see her in just over 100 days for a whole week!

Friday, December 2, 2011

Surprise! Dress Fittings All Around

Yesterday had been a LOOOOONG kid heavy day and I was exhausted. I fully admit to calling one of my lovely bridesmaids crying because I was stressed out. I complained about how busy ALL of my bridesmaids are. I didn't fault them at all. In fact, I felt guilty placing demands on them at all, but I was dying to see my darn dresses. In what I thought was a completely unrelated move that bridesmaid invited me to dinner. She invited my family or so I thought.

That night she let it slip that she had her dress already. I waited on the couch for her to model it for me. I was excited and completely oblivious. Then she said "I like it, but I just don't feel like myself". I was panicking when a different bridesmaid stepped into the living room in her dress. Relief and shock flooded over me. They really got me. I thought no one had their dress or time for me. Here they were in their dresses.

Mike took my kids home and us girls prepared for a lovely meal. There was some bad news though. First of all, my third local bridesmaid had her car breakdown just blocks away and wasn't able to make it, poor thing. Second, everyone's dresses were a size too big. It was pretty funny actually. At least we have three months for alterations.

Before I show you pictures the dress color doesn't look right in pictures it's too bright and shiny with a flash and too gray without one. This is only an approximation of the color.

I even had Mike bring my dress over so they could see me in it. They loved it. In fact, despite the largeness of their dresses they seemed pleased. When pressed to give criticism the only remark made was "it would look better with heels" for obvious reasons that's a no go. They really are great sports, I'm so lucky. It was nice to see their dress next to mine. It felt so surreal.

It was a great night! Sometimes it's just good to check in with your friends.

Wednesday, November 16, 2011

Women and Children First

Apparently, some time last week my bridesmaids dresses came in. I found the letter in a pile of junk mail. I was told to expect them in January so this a nice surprise. I sent a text out for the girls to go pick them up and let me know when they have them. I haven't seen them in the right color (emerald dupioni silk) yet so I'm so excited.

With the kids attire all done (minus fairy wings) and bridesmaids dresses in it's starting to feel a lot more real. Any minute now I'll be getting married, which is hard to imagine this week with my broken hip. So, that's the women and children. Now we just have to nail down the men and we're all dressed. Woah.

Speaking of dresses I'm going to be making the final payment on my dress and hopefully receiving it right around Christmas. Can you imagine?!? The year is almost over which means the year I'm getting married in will be starting any minute.

I can't wait for all the girls and kiddos (including me) to try on their clothes. I'll probably share some pictures of the kids and the bridesmaids dresses in the right color, but I don't think I want to post any of me wearing my actual dress. Yay!

Thursday, October 20, 2011

Bridesmaids Totes: Part 2

Materials

  • Acrylic paint
  • Rubber Alphabet Stamps (or stencil)
  • Cardboard
  • Fine tip Sharpies
  • Q-tips and a damp rag

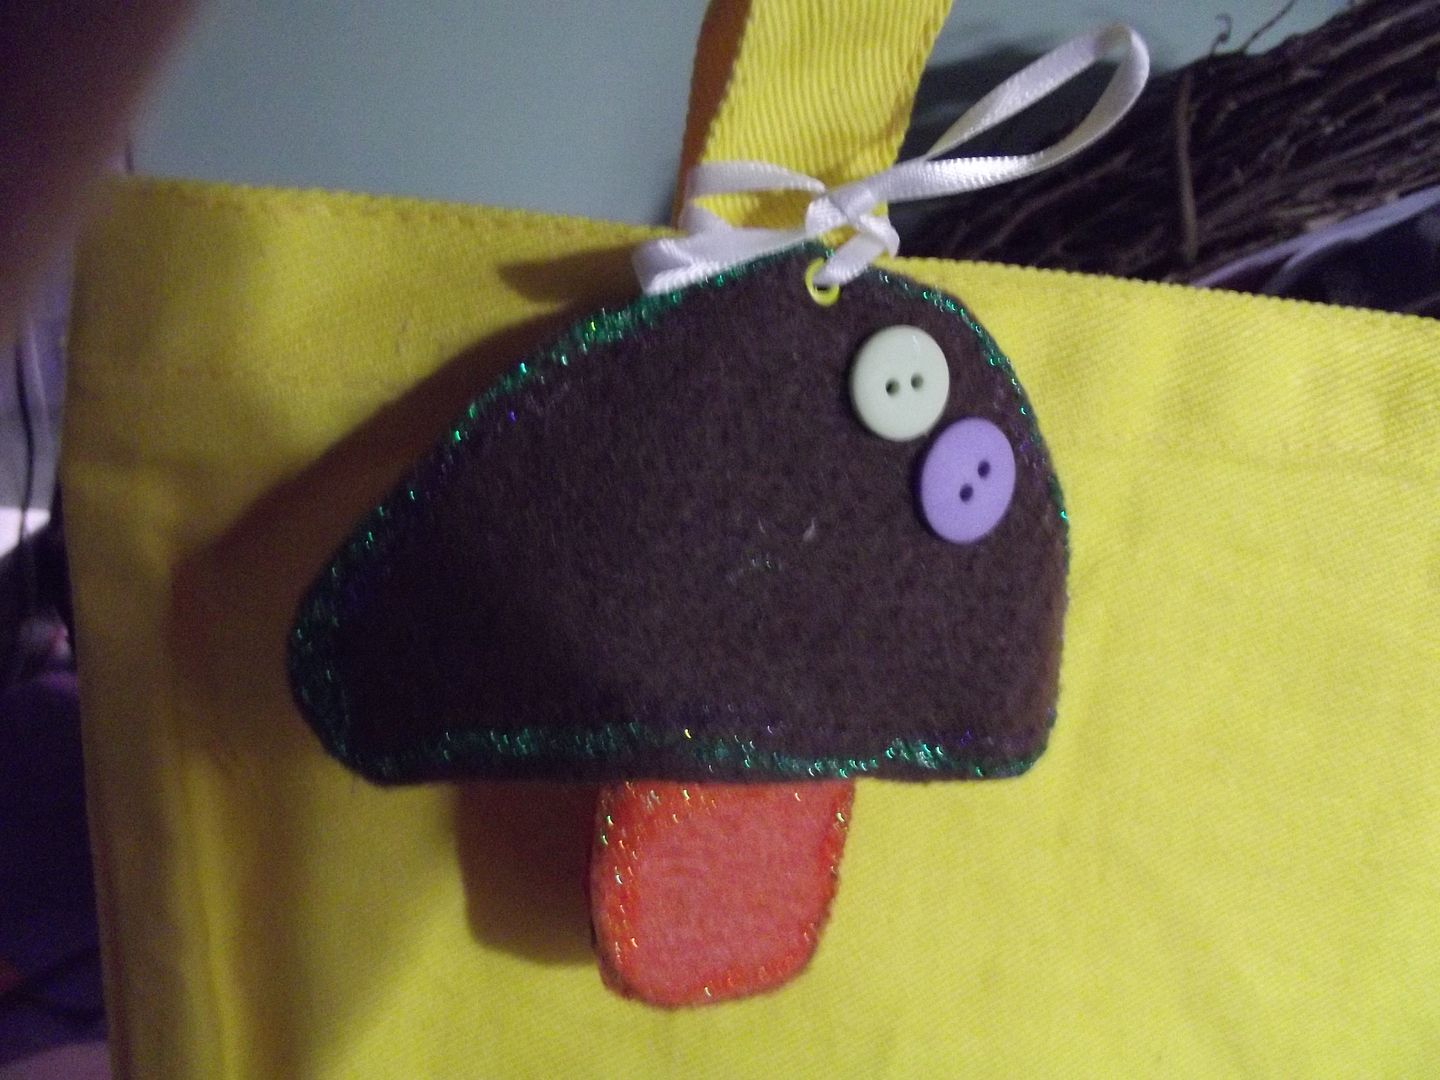
Here's one of the felt mushroom tags I made yesterday:


Test Phase

So, today I tracked down a letter stencil (Yay, crafty friends). I pondered long and hard over how to get this letters on these bags. I figured I'd probably use paint and the stencil. I tested black, white and brown acrylic paint on an extra tote. I also tried Sharpie in brown and purple. I really liked the white paint option, but there wasn't enough. I decided on brown. Then I tested paint through the stencil versis paint on a stamp. In the end I went with brown paint on a stamp.

Crafting

Start by setting your bag on a flat surface and inserting the cardboard. You want a nice hard surface to press the stamp against. I found it worked best when I dipped the very edge of a foam brush in the paint and then painted the letter. I used q-tips to clean up any excess paint around the letter. If you're not careful you'll get an ugly box from the edges of the rubber. My letters were decorated with leaves so excess painted turned the leaves into blobs. Position your letters far enough up not to be obscured with the bag is full and far enough over not to creep around the edge. Press firmly and lift using your other hand to hold the fabric to prevent sticking or smudging.

Full disclosure here, I forgot to check my hands for paint after all my tessting and I smudged the first one I did twice. Once while stamping and once while trying to wipe it off. I advise any fellow lefties to keep a spare piece cardboard to rest your on while stamping just in case. So, I turned them into leaves on a vine with a brown fine tip Sharpie.

After that I decided to add a different vine detail to each bag. I allowed the paint to dry for a few minutes and then used the fine tip Sharpie to fill in any holes in the paint or correct decorative elements turned bloby. They came out pretty good. Here's the first one done:

It's funny my Maid of Honor and one of my bridesmaids have the same intial letters in opposite order.

On top of that my sister and Mike's sister have first initials a few letters apart and the same last initials.

Viola! I'll be building the wedding day emerency kits with the help of a bridesmaid over the next several months and ordering the shirts I designed for the rehearsal shortly. I already have the bridesmaids necklaces. I'm just so excited that the actual bags are done. I hope they like them. You totally wish you were in my bridal party...

Wednesday, October 19, 2011

Bridesmaids Totes: Part 1

I wanted to make cute little mushroom tags for the bridesmaids totes. Like the ones I saw at Bride's Night Out. Obviously, I'm not a skilled enough sewer to reproduce this exactly. I just used it as inspiration.

Materials

  • Cardboard
  • Several colors of felt (or patterns on fabric)
  • Fabric glue
  • Fabric/puffy paint
  • Buttons
  • Crop-a-dile
  • Grommets
  • 1/8" ribbon
  • Bright colored tote bags

I have four wonderful bridesmaids and I happened to get these four bright colored bags from someone who decided not to do a craft project earlier in the year. I love cast off craft supplies. They're cute, right? I'm going to fill them with wedding day emergency kits, their bridesmaids necklace and the shirts I made for the rehearsal.

First, I drew the two halves of the mushroom on some cardboard. I used a roll of duct tape to help me get the round part of cap right. I traced the stem template on some stiff orange felt. I traced twice as many as the number of mushrooms I needed.

I made all the stems orange. I varied the color of the caps purple, brown or pink. I attached a stem to each cap. Then I decorated each mushroom with glittery puffy paint and buttons.

Once the paint dried I flipped them over and added a strip of cardboard to each mushroom with fabric glue. I covered the bottom half with the extra stems I cut out in the beginning. Then I cut a piece of felt to cover the top. It's important that there is still a border of felt above the cardboard for the next step. Here's the back of one after I added cardboard and felt.

Once the glue dried I used a black Sharpie to write the name of each girl and the wedding date on the back. Then I added a grommet that matched the color of the tote each mushroom would be attached to with my Crop-a-dile. I threaded it with ribbon and tied a small bow in the front. So cute!

Next, I'll personalize each tote bag with the girls' initials. I had all the supplies for this first part on hand and all I need for monogramming them is a letter stencil (or a new Silhouette blade so I can make one), woo-hoo resourcefulness. Double woo-hoo cuteness! I'm so excited to fill this with goodies!

Wednesday, October 12, 2011

Head To Toe: Maids

So, my girlies are pretty much set as well. For my attendants I went less whimsical and more classic 1950's. I fell head over heels for their dress and It's another part of my style as it were, so there you go.

Hair
It's called a chignon, apparently. I thought since I was doing half up with flowing curls it would be a nice contrast for them to wear their hair up. I want it low like this picture, but perhaps a bit messier. Maybe making a crisscross of hair above the beginning of the fold. Maybe some tendrils? It's going to look so nice with their dress.

They'll all have one of these in their hair on the side. It'll unify all the girls' dos since 3 will have their hair up and MOH's hair is too short for the chignon. They'll also have anemone wrist corsages and be carrying antiqued lanterns with anemones and dark green fern leaves instead of bouquets. My original wedding colors were black, white and emerald and it lives on in the maids.

Make-up

My beauties all opted to do their own and I trust them to be radiant.

Jewels
This is the necklace the girls agreed on. It's got a touch of classic style with the pearl and a some whimsy with the leaf. I really like it and I hope they all wear it again after the wedding. I gave them free reign for any other accessories they want.

Dress

It's Jim Hjelm Occasions style 5007. It's dupioni silk and tea length. We ordered it in emerald. So pretty. Much more fun than the plain strapless black dresses I was initially looking for. They should be in by January. I can not wait to see them in the right color.

Shoes

I found these at Payless. Don't you love a little sparkle on a shoe? I'm very tiny so I insisted on flats and when I found these I let the girl choose the color they wanted. They all got black. So, all the girls will be head to toe black, white and dark green. I'm certain their shoes will get worn again. There's nothing like a simple black flat.
Ta-da, again!